
Spam submissions in Elementor forms can quickly become a serious problem—wasting time, cluttering your inbox, and even risking security. If you’re using WordPress with Elementor, there’s a simple and effective solution: blocking spam users by email, domain, or IP address. In this guide, you’ll learn how to completely stop spam submissions using the SpamLock plugin, including full setup and step-by-step instructions.
Overview of the Plugin
The SpamLock – Email, Domain & IP Blacklist for Elementor Forms plugin is designed to give you full control over who can submit your forms.
👉 Plugin URL: https://wordpress.org/plugins/spamlock-email-domain-ip-blacklist-for-elementor-forms/
This plugin works by validating every Elementor form submission and checking it against a blacklist stored in your database. If a match is found, the submission is instantly blocked.
Key functionality includes:
- Block specific email addresses
- Block entire domains (e.g., @spam.com)
- Block IP addresses
- Custom error messages
- Export blacklist data (CSV)
- Simple admin panel inside WordPress
The plugin hooks directly into Elementor form validation logic, ensuring spam is stopped before submission is processed
Advantages of Using This Plugin
1. Complete Spam Control
Instead of relying on CAPTCHA or third-party tools, you directly control who gets blocked.
2. Multi-Level Blocking
You can block:
- Individual users (email)
- Entire companies/domains
- Suspicious IP addresses
3. Lightweight & Fast
No external APIs. No performance impact.
4. Custom Error Message
Show a message like:
“Your submission has been blocked.”
Or customize it to match your brand tone.
5. Export & Manage Data
Download your blacklist anytime as a CSV file.
6. Seamless Elementor Integration
Works automatically with Elementor forms, no extra setup needed.
Step-by-Step Guide (Installation → Full Setup)
You can attach screenshots at each step while following this structure.
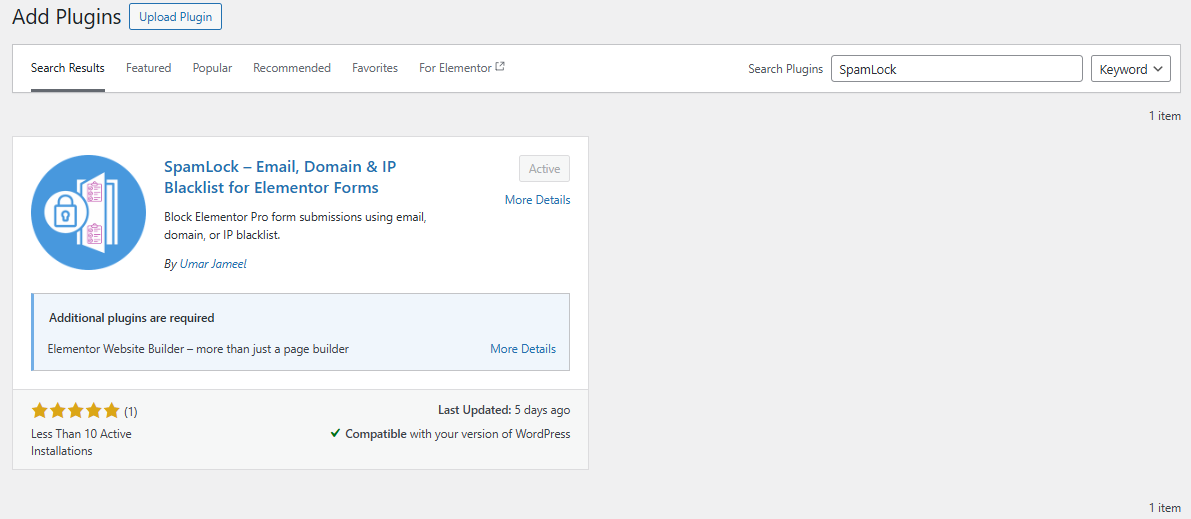
Step 1: Install the Plugin
- Go to your WordPress Dashboard
- Navigate to Plugins → Add New
- Search for: SpamLock Elementor Forms Blacklist
- Click Install Now
- Click Activate
Step 2: Access the Plugin Panel
After activation:
- Go to Dashboard → Form Blacklist
This opens the plugin admin page where everything is managed.
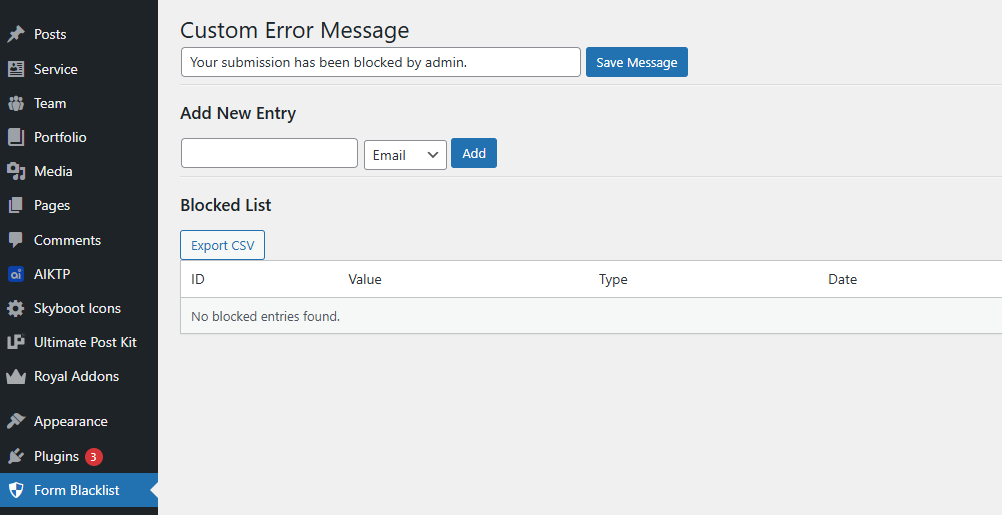
Step 3: Set Custom Error Message
At the top, you’ll see:
Custom Error Message Field
-
Enter your preferred message
Example:“We cannot process your submission.”
- Click Save Message
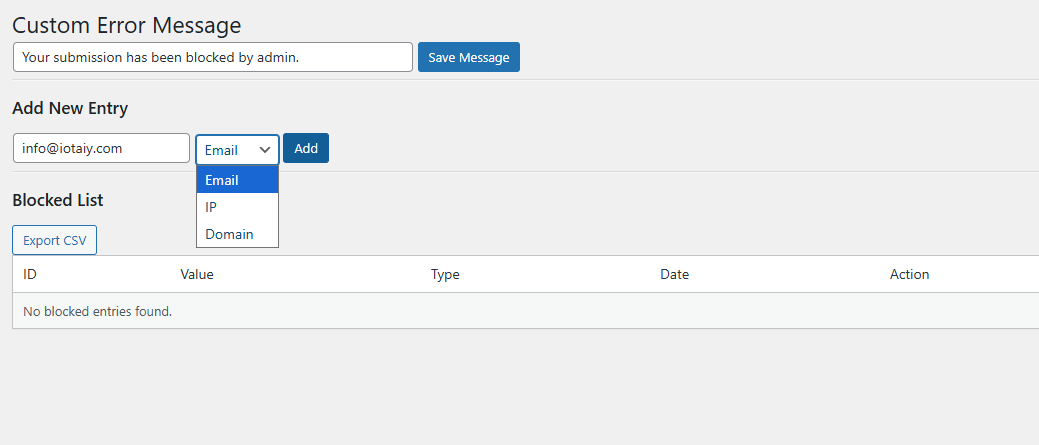
Step 4: Add a Spam Entry
Under Add New Entry:
- Enter value:
- Email →
spam@example.com - Domain →
spamdomain.com - IP →
192.168.1.1
- Email →
- Select type:
- Domain
- IP
- Click Add
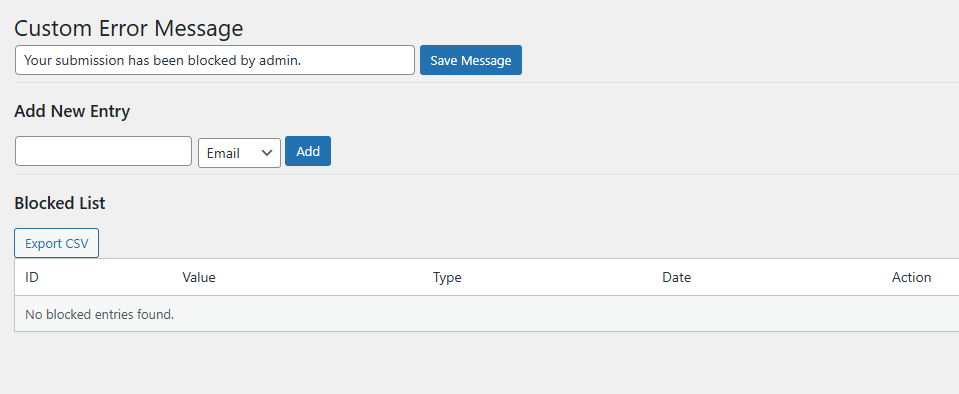
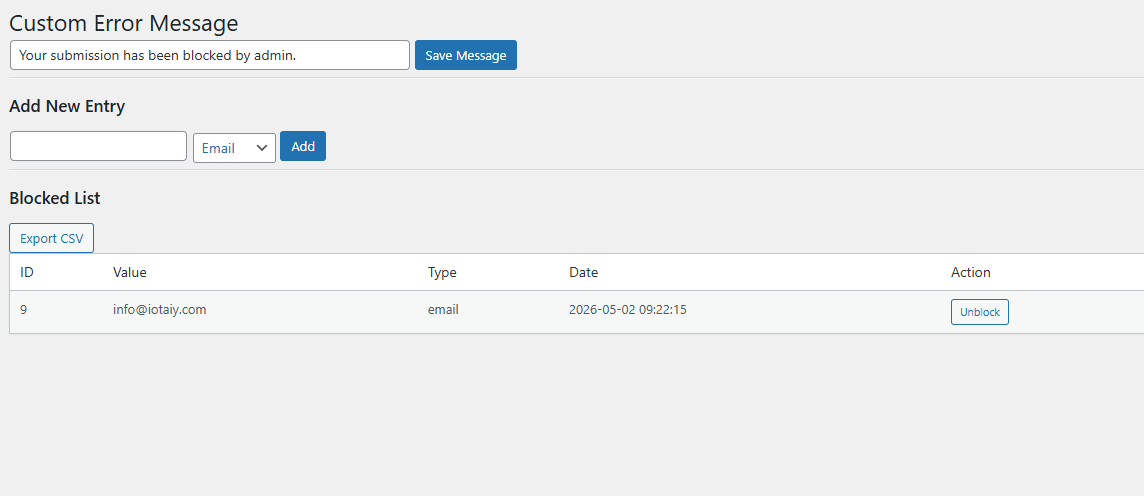
Step 5: View Blocked List
Scroll to Blocked List:
- See all entries
- View:
- Value
- Type
- Date added
You can also:
👉 Click Unblock to remove any entry
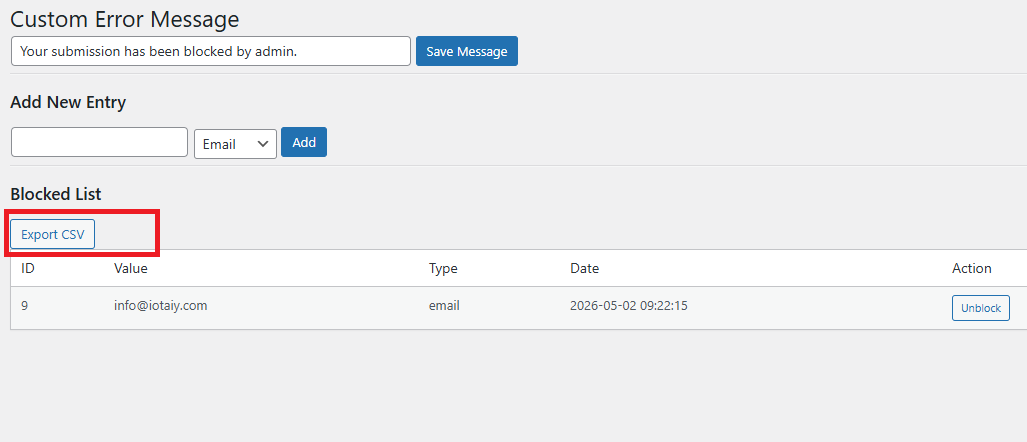
Step 6: Export Blacklist (Optional)
Click Export CSV
This downloads all blocked entries for backup or analysis.
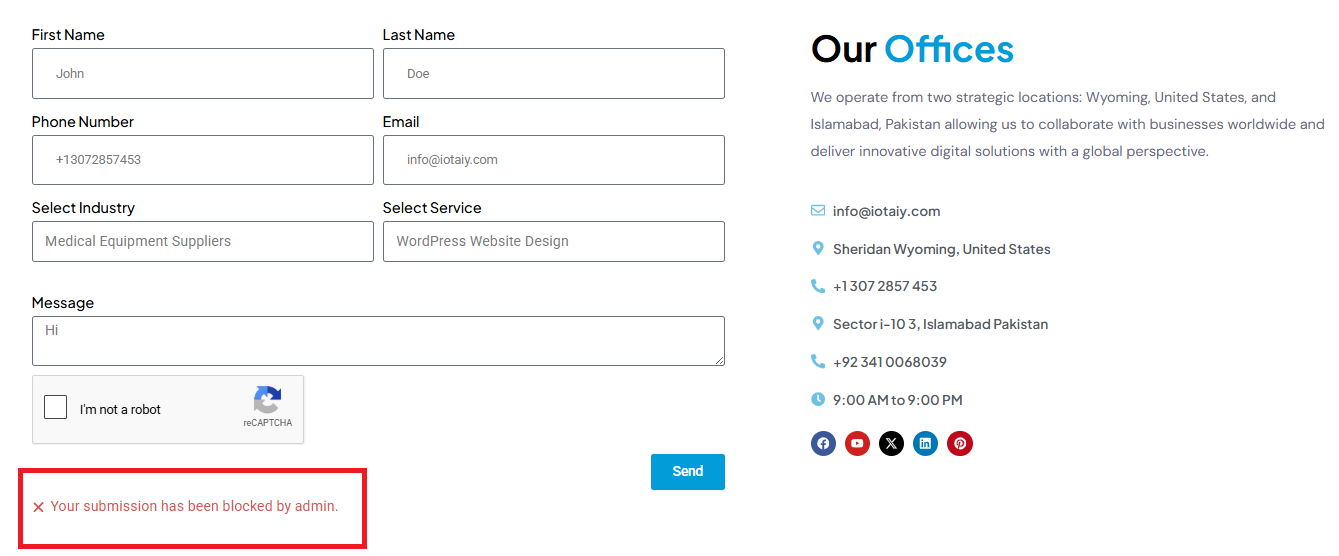
Step 7: How It Works Automatically
Once configured:
- User submits Elementor form
- Plugin checks:
- IP
- Domain
- If match found:
- Submission is blocked
- Error message shown
No additional configuration required.
Real Use Cases
- Blocking fake leads from marketing campaigns
- Stopping bot submissions
- Preventing repeated spam users
- Blocking entire competitor domains
- Filtering junk form submissions
Why This Is Better Than CAPTCHA
| Feature | CAPTCHA | SpamLock |
|---|---|---|
| User Experience | ❌ Poor | ✅ Clean |
| Control | ❌ Limited | ✅ Full |
| Blocking Domains | ❌ No | ✅ Yes |
| Performance | ❌ Slower | ✅ Fast |
Final Thoughts
If you’re serious about keeping your Elementor forms clean, this plugin gives you full control with zero complexity. It’s simple, fast, and solves one of the most common problems WordPress users face.
Need Help or Custom Development?
If you need customization, advanced spam filtering, or full website development: